Baked Classics
I often find myself back to nostalgia la la land in this column. Mind you, I don’t think that is an entirely bad thing. Most of us have very happy thoughts of our childhood, and the food we ate has a large part to play.. There are good things and bad things tied into nostalgia. In respect to food, some of the good things are comparing the then to now. The way we have embraced food styles from all over the world to start with, and how we have incorporated them into our fusion of traditional and modern is something we are all to be commended for. The huge choice of foods we have now is far more desirable than the limited range we had when I grew up. I have thankfully let go of the days of meat and three veg, and the boring monotony of chops on Monday night, cutlets on Tuesday night, sausages with gravy on Wednesday night etc as if by diversifying we would break some sacred ritual. So, there is a lot I don’t lament leaving in the past, except to use it as a simile of how NOT to do things.
But there are also some very important elements of food back then that we have lost, and that is very lamentable. Perhaps the greatest loss, particularly in our modern world where everyone is in such a rush to get things done as quickly as possible, is the lack of ‘neighbourhood’ in cooking, that silent, unacknowledged exchange of respect, love and communication that used to happen in the burbs of the 50s and 60s. I miss the Saturday cook-off more than anything else from that time. In Melrose Ave at Sylvania, every Saturday was baking day in every house on the street. You could smell cakes and pies baking as you walked down the footpath. Every mother excelled in particular products – in out house my mother made delicious jam and coconut tarts, and an apple and rhubarb pie that I can still taste; Mrs Gill next door to us did fantastic pumpkin scones and banana pikelets; Eadie Samways over the road did mouth-watering passionfruit sponges, and cup cakes. Mrs Johnson next door to her did apricot slice and truly delicious chocolate cakes…you get my meaning. But it wasn’t that they just cooked for themselves. The fruits of their labour were shared amongst the other households in the street. Doorbells would be ringing all day as tea towel covered plates of treats were shared amongst the other families in the street. And it wasn’t just the treats that were shared – those without the luxury of a Mixmaster would be lent one by a luckier neighbour, and recipes were swapped constantly. Baking helped to create community. As a kid growing up in this environment, I had an excellent time roaming from house to house sampling wares, licking beaters and bowls, hands sticky and eyes as big as dinner plates. It was a true assault on the senses.
That is perhaps the one thing I would like to see return. Now, if we can just teach people to love cooking instead of seeing it as a fast food chore…
This is a nostalgic look at baking.
SCONES:
2½ cups self-raising flour
1 tablespoon caster sugar
¼ teaspoon salt
30g butter
¾ cups milk
½ cup water (Approx)
Preheat oven to very hot (240°C) . Either grease an 18cm square pan or a baking sheet.
Sift flour, sugar and salt into a large bowl. Rub in butter with fingertips until it resembles fine breadcrumbs.
Make a well in the centre and add milk and almost all the water. Using a knife ‘cut’ the milk and water through the flour mix until you achieve a soft, sticky dough. Use your own judgement to decide if the rest of the water needs to be added or not..
Turn the dough onto a lightly floured surface and knead quickly and lightly to a smooth dough. DON’T USE TOO MUCH FLOUR FOR THIS, otherwise you end up with an over-floured dough.
Using hands press the dough out to a 2cm thickness. Don’t be too fussy – scones should be rough. Dip a 4.5 cm cutter (or a glass or a cup rim) into flour and cut rounds from dough. Continue reworking dough until it is all used up. Pack rounds together in cake tin, or on baking sheet.
Brush with milk and bake in very hot oven for 15 minutes. Turn onto wire rack to cool, or break in half and butter while hot to get that yummy, runny butter all over your hands as you devour it. Naturally, they are also great with strawberry jam and whipped cream. For variety throw in a handful of sultanas, raisins or dates.
APPLE PIE:
1 cup plain flour
½ cup self-raising flour
¼ cup cornflour
¼ custard powder
2 tablespoons caster sugar
125g cold butter, chopped
1 egg, separated
¼ cup iced water, appox
FILLING:
7 (1.5 kg) large apples
½ cup water
2 tablespoons sugar
¼ teaspoon ground cinnamon
1 teaspoon grated lemon rind
For filling – Peel apples, cut into quarters. Remove cores and cut in half lengthways. Place apples in a large saucepan with water; bring to the boil. Reduce heat; cover. Cook about 5 minutes or until apples are just tender. Transfer to a large bowl, gently stir in sugar, cinnamon and lemon rind. Cool to room temperature.
For pastry – Blend or process flours, custard powder, half the sugar and all the butter until combined. Add egg yolk and just enough water to get all ingredients to come together. Knead on lightly floured surface until smooth, then press to a disk and wrap in plastic wrap. Refrigerate for 30 minutes.
Roll two-thirds of the pastry between sheets of baking paper until large enough to line a 23cm pie dish. Line dish. Trim edges. Cover and refrigerate for 30 minutes.
Preheat oven to moderate (180°C)
Roll remaining pastry between sheets of baking paper until large enough to cover pie. Discard scraps.
Spoon filling into pastry case, brush edge with lightly beaten egg white. Cover filling with pastry sheet, press edges together then trim using knife. Pinch edges to make a frill. Brush top with remaining egg white and sprinkle with remaining sugar.
Bake pie in moderate oven for 40 minutes or until golden brown.
Raspberry Coconut Slice;
90g butter
½ cup caster sugar
1 egg
¼ cup self-raisinhg flour
2/3 cup plain flour
1 tablespoon custard powder
¼ cup raspberry jam (or to your own flavour)
Coconut Topping;
2 eggs, beaten lightly
¼ cup caster sugar
2 cups desiccated coconut
Preheat oven to moderate (180°C). Grease 19cm x 29cm slice tray; line the base and sides with baking paper, extending it over the edges of the pan by 2cm.
Beat butter, sugar and egg in a small bowl with an electric beater until it changes to a lighter colour; stir in sifted flours and custard powder. Spread mixture over base of prepared pan.
Bake in moderate oven for 15 minutes. Stand in pan for 10 minutes.
Spread slice base with jam, then sprinkle with coconut topping (for coconut topping combine all ingredients in a small bowl).
Return to moderate oven, bake for a further 25 minutes or until browned lightly. Cool in pan before cutting.
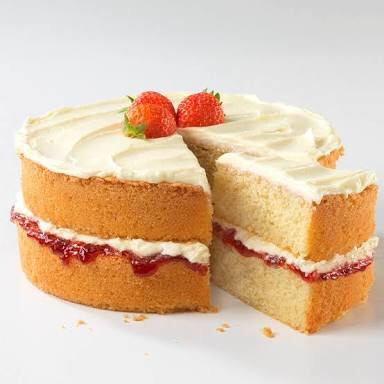
Best-Ever Sponge Cake;
I used to think making sponges was a real chore, and they never seemed to be light as they should be – in fact, mine used to be like butter cakes. After experience – and a determination to get them right – I found that I was too heavy-handed with them. The trick is to get the eggs and sugar really aerated and foamy, then to quickly and lightly fold in the flour using either your hand (the traditional way) or a large metal spoon. Don’t fiddle with them, otherwise you loose the air that makes them so light.
4 eggs
¾ cup caster sugar
1 cup self-raising flour
1 tablespoon cornflour
10g butter, softened
1/3 cup hot water
1/3 cup lemon butter (or jam if you prefer)
¾ cup thickened cream, whipped
1 tablespoon icing sugar mixture
Preheat oven to moderate 180°C. Grease 2 x 20cm deep round cake pans.
Beat eggs in a large bowl with electric mixer until thick and foamy. Gradually add sugar about 1 tablespoon at a time, beating until sugar is dissolved between additions. Total beating time should be about 10 minutes.
Sift flour and cornflour together three times onto a sheet of paper. Sift flour mixture over egg mixture, then using a raking movement with your hand lightly fold and pull the flour mixture through the egg mixture. Use your hand to scrape the sides of the bowl.
Pour combined butter and the water down side of bowl, using one hand fold through the egg mixture. Pour mixture evenly into prepared pans, using metal spatula spread mixture to edge of pans.
Bake sponges in moderate oven about 25 minutes. Immediately sponges are cooked turn onto cooling wires spread with baking paper. Turn top-side up to cool.
Place one sponge on serving plate, spread with filling and whipped cream. Top with remaining cake and sprinkle with icing sugar mixture.
Banana Cake with Passionfruit Icing;
125g butter, softened
¾ cup firmly packed brown sugar
2 eggs
1½ cups self-raising flour
½ teaspoon bicarbonate of soda
1 teaspoon mixed spice
1 cup mashed banana (preferably 2 over-ripe ones)
½ cup sour cream
¼ cup milk
Passionfruit Icing:
1½ cups icing sugar mixture (actually a mix of icing sugar and cornflour)
1 teaspoon soft butter
2 tablespoons passionfruit pulp, approx
Preheat oven to moderate 180°C. Grease 15cm x 25cm loaf pan, lining base with baking paper.
Beat butter and sugar in a small mixing bowl with electric beater until light and fluffy. Beat in eggs, one at a time, until combined. Transfer mixture to a large bowl, using a wooden spoon stir in sifted dry ingredients, banana, sour cream and milk. Spread mixture into prepared pan.
Bake cake in moderate oven for about 50 minutes. Stand cake in pan for 5 minutes before turning out onto wire rack to cool. Spread with passionfruit icing.
Passionfruit icing: Place icing sugar in a small heatproof bowl, stir in butter and enough pulp to make a firm paste. Stir over hot water until icing is of spreading consistency, taking care not to overheat. Use immediately.
Date & Walnut Loaf; Although it is traditional to make this tea roll in a round tin, these can be expensive to buy if you don’t have them in the cupboard. Use an ordinary loaf pan instead, or use well-cleaned fruit tins with a double thickness of foil for a lid. These rolls can be frozen for up to three months.
60g butter
1 cup boiling water
1 cup finely chopped, seeded dried dates
½ teaspoon bicarbonate of soda
1 cup firmly packed brown sugar
2 cups self-raising flour
½ cup coarsely chopped walnuts
1 egg, beaten lightly
Preheat oven to moderate 180°C. Grease 2 x 8cm x 19cm nut roll tins (from any good kitchenware store), line bases with baking paper. Place tins upright on baking tray.
Combine butter and water in medium saucepan; stir over low heat until butter melts.
Transfer mixture to a large bowl; stir in dates and soda, then sugar, flour, nuts and egg.
Spoon mixture into prepared tins, replace lids.
Bake rolls, tins standing upright, in moderate oven about 50 minutes.
Stand rolls for 5 minutes, remove both lids and shake tins gently to remove rolls onto wire rack to cool.
Serve with lashings of deliciously unhealthy butter.
Tim Alderman
Copyright 2014